The following tips are based on PhotoShop CS (8.0), but similar tools exist in PS versions 5-7.
What's it good for?
DDP stands for Digital Development Process and is a non-linear image manipulation
used to bring out dim areas in high dynamic range images, without
saturating or overexposing the brighter areas. DDP was first introduced and
documented by Kunihiko
Okano. In addition to histogram manipulation,
DDP applies a level of sharpening to the resulting image. The method presented
here was developed to accomplish both, sharpening and bringing out dim areas
using standard PhotoShop functions.
NOTE: the process described here is not a real DDP as described by Dr. Okano, but a PhotoShop workflow meant to produce an effect similar to DDP.
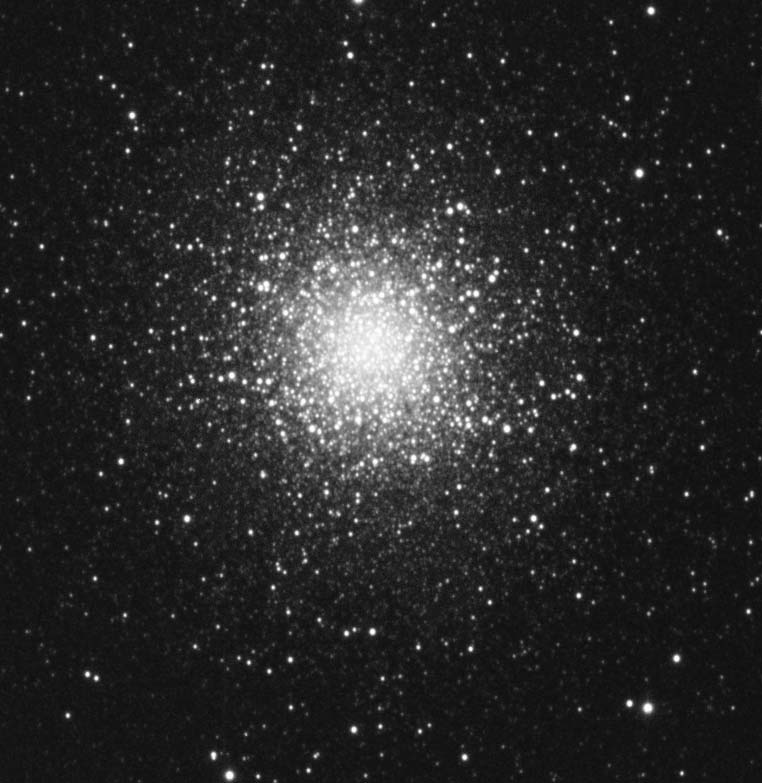
In my testing, this process works best on a large nebulae, but is worthwhile to try on galaxies and even globular clusters. How well does it work? Here are some example images processed this way.
The Method
In summary, the idea is to use the Overlay layering mode in PS
to simulate division of the original image by a blurred copy of itself. PS
overlay mode actually works as both, Screen and Multiply modes, depending on the
brightness of the background. This produces the additional histogram stretching
effect that brings out the dim areas, while controlling the brightness of
the light ones.
I've developed a PhotoShop Action that performs most of the PS DDP processing for you automatically. At the end of the action, you can decide how much blurring to apply, and then work on the brightness/contrast of the resulting image. Download the PS DDP action here. The action performs steps 3-9 automatically.
Here is the step-by-step workflow:
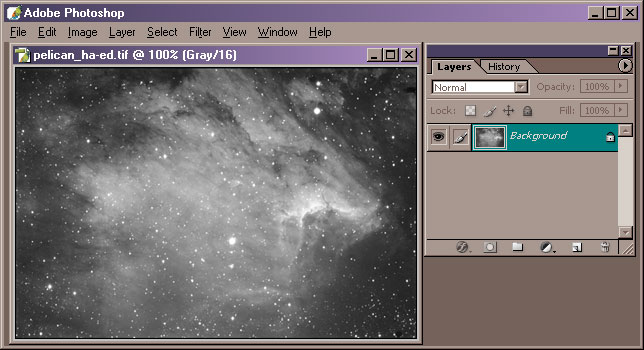
1. Load the original grayscale image. If you're using version 8 of PhotoShop,
keep all the processing in 16 bits, otherwise convert to 8 bits grayscale.
2. Adjust levels and curves so the image is at the brightness level to you'll ultimately want, without saturating or overexposing bright areas.
3. Copy image into clipboard (Ctrl-A followed by Ctrl-C)
4. Invert image (Ctrl-I)
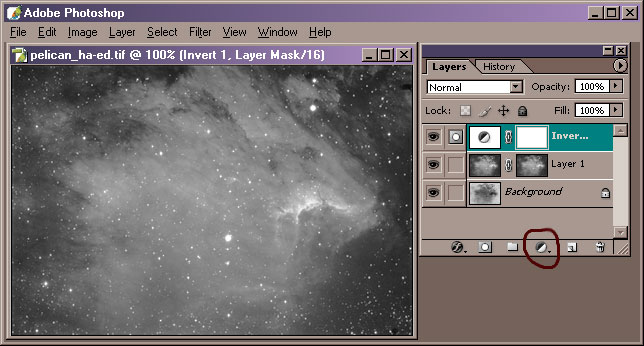
5. Paste original image as a new layer, Layer 1 (Ctrl-V). Set blending mode to Overlay.:

6. Optional, but recommended:
Add a layer mask to Layer1 and paste the clipboard contents into the mask:
Click on Add Layer Mask icon, circled in the above image
Activate Layer Mask by clicking mouse button on it, while holding down the Alt key
Paste the clipboard image into the mask by pressing Ctrl-V
Select the whole Layer 1 by clicking on the image icon left of the mask:

7. Add an an Invert adjustment layer above Layer 1 from Create new Fill or Adjustment Layer icon, circled below:
8. Re-activate Layer 1 by clicking on it in the Layers palette.
9. Apply Gaussian blur to Layer 1 (Filter/Blur/Gaussian Blur... menu). Start with 1-5 pixel radius, but try larger radius also to see what works best.
10. If necessary, adjust the Layer 1 blending percentage to less than 100% to reduce any undesirable sharpening effects.
Optional:
Adjust curves/levels on the Layer 1 mask to increase/decrease the effects of sharpening
If you want the sharpening to apply only to dark areas, select and invert the Layer 1 mask
Use stars removal algorithm on the Layer 1 mask if you don't want sharpening to apply to stars
Adjust curves/levels on the Background layer to increase/decrease contrast of the resulting image
11. Flatten image using Layer/Flatten Image menu.
This action was created in PhotoShop CS, I'm not sure whether it'll work in any other version of PhotoShop.
Extract DDP.atn from the zip and move it into PhotoShop's Actions directory. For PhotoShop CS, it's commonly located in:
C:\Program Files\Adobe\Photoshop CS\Presets\Photoshop Actions
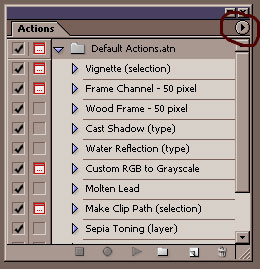
Bring up Actions palette by pressing Alt-F9
Select Actions menu from the arrow at the top right of the palette, and choose Load Actions command
Select DDP.atn file and press Load button. The action will now be available in PhotoShop, even after you shut down and restart.
Load the image you want to process, adjust levels/curves as needed
Press Shift-F12 on your keyboard to invoke the action. It's located in the Action palette, under DDP.atn.
When the action completes, you'll be left in the Gaussian Blur dialog with a default of 4.5 pixels blur. This is step 9 in the process above. Feel free to play with the blur setting, and all the other optional settings described above.
Note: Although this PhotoShop action will not work on color images, the process described above can be successfully applied to RGB images, simply by following the directions. The action has some dependencies on PhotoShop generated names, and these are different for color images than they are for grayscale, so you'll get some errors if you try the action on a non-grayscale image.
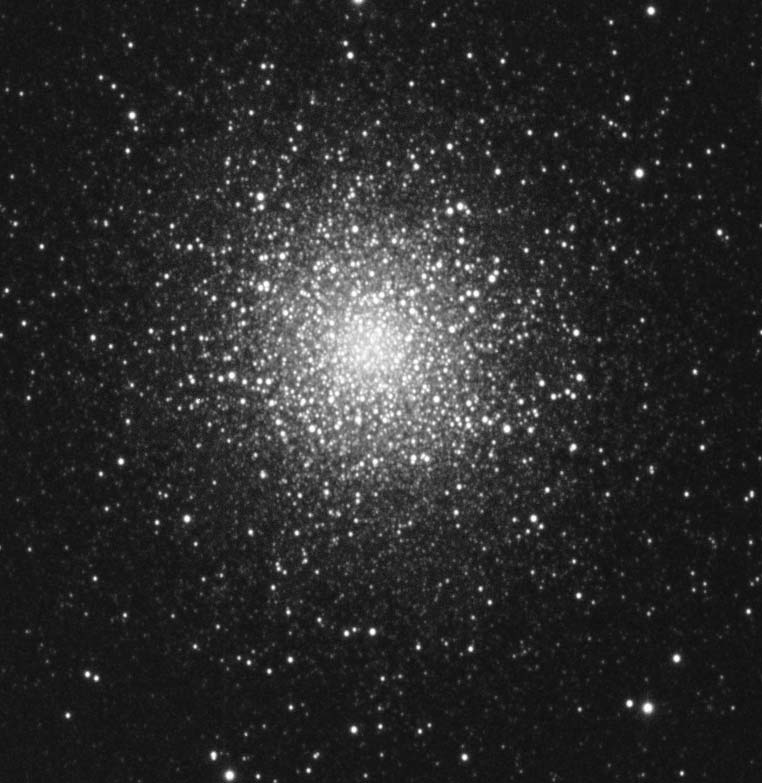
M13 Globular: Original and PS DDP Processed
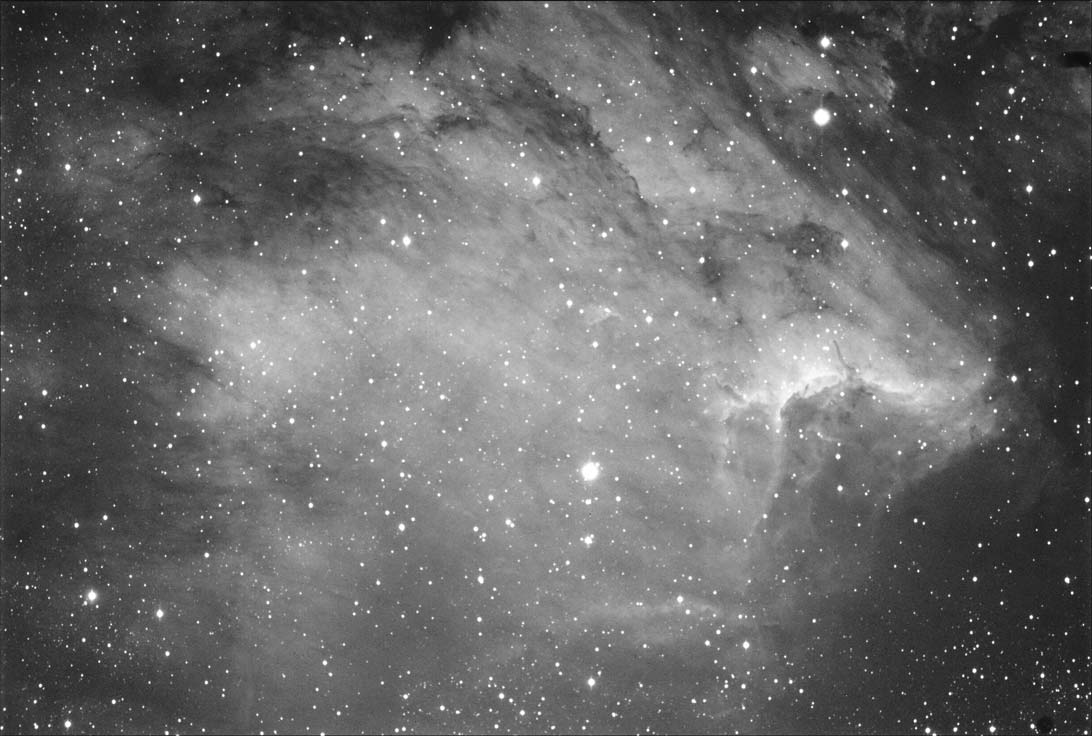
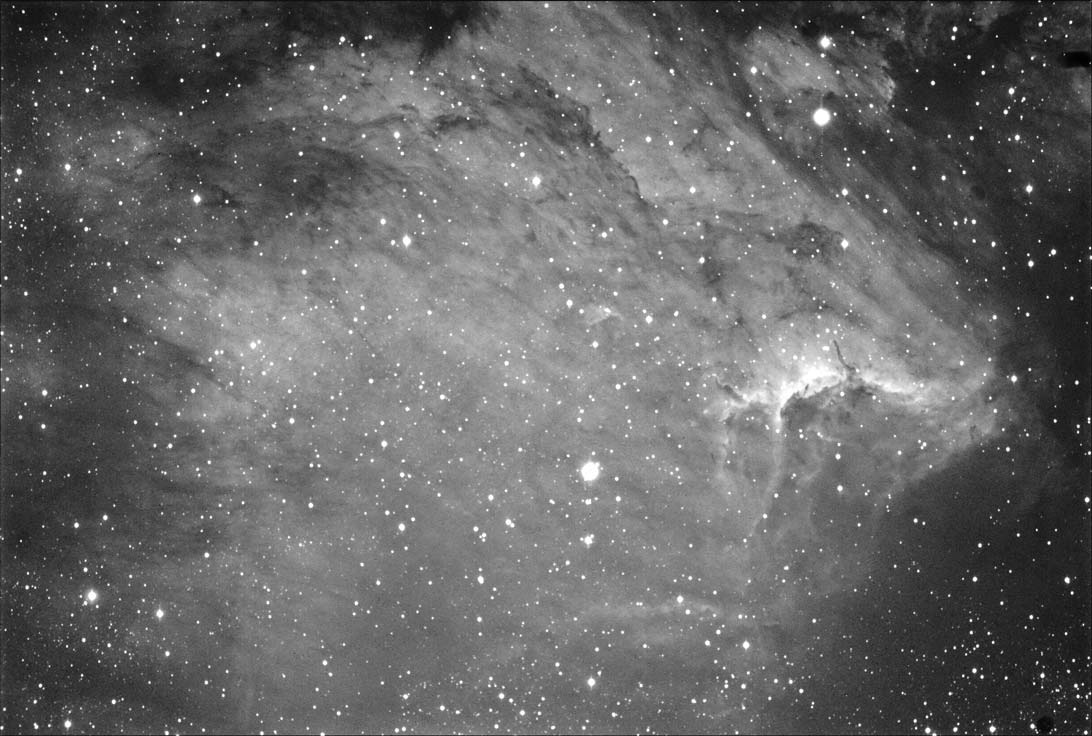
Pelican Nebula: Original and PS DDP Processed
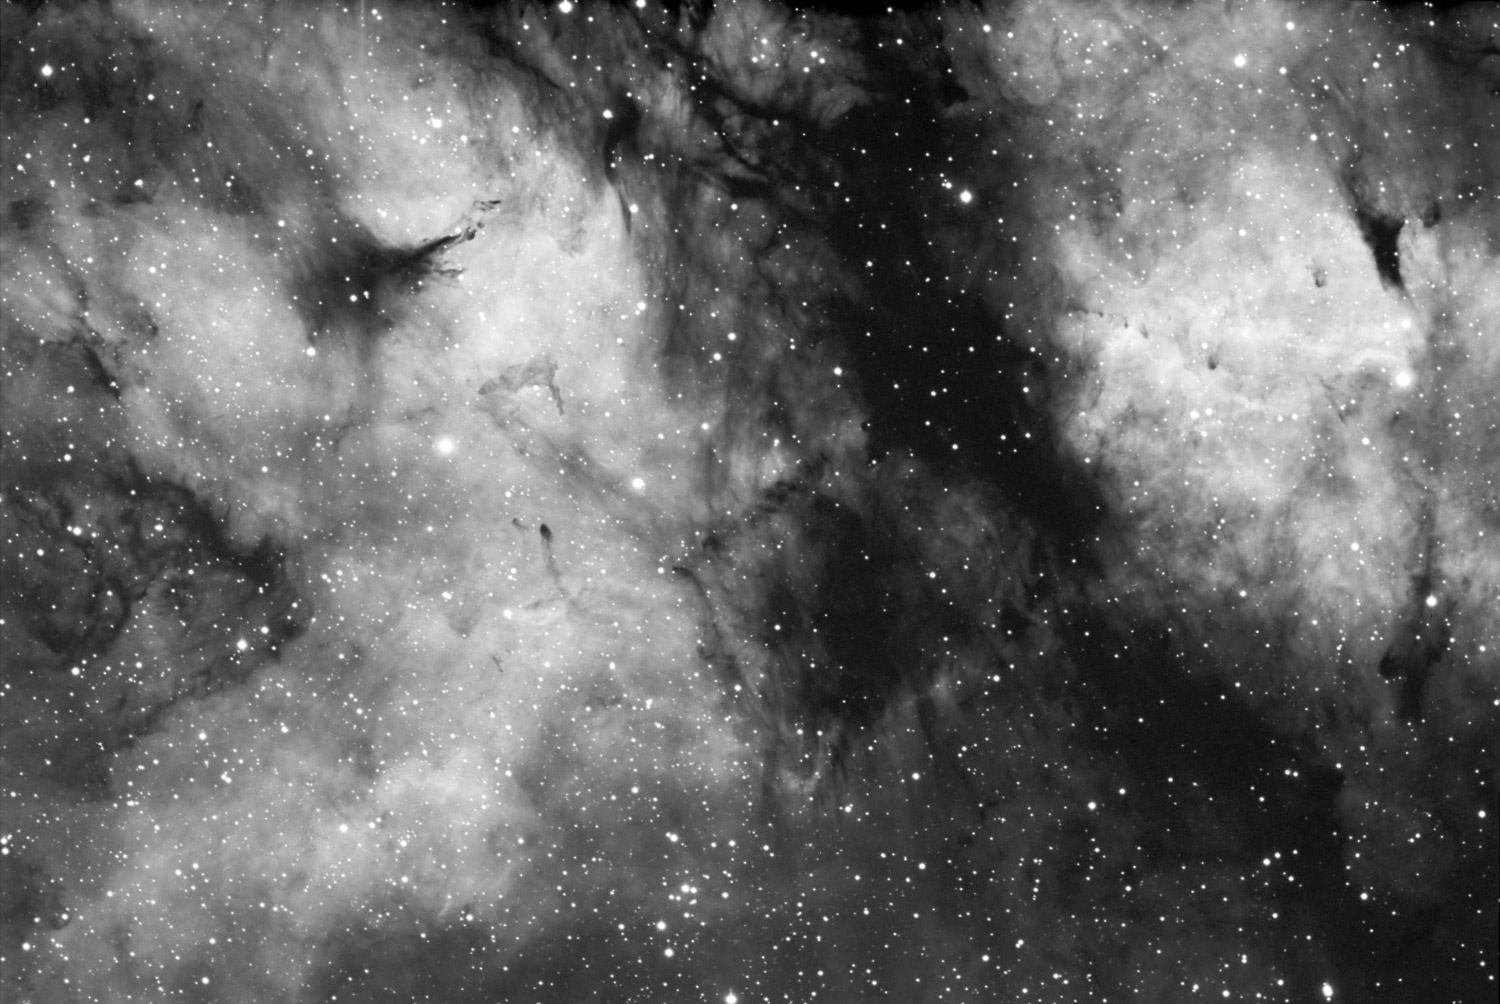
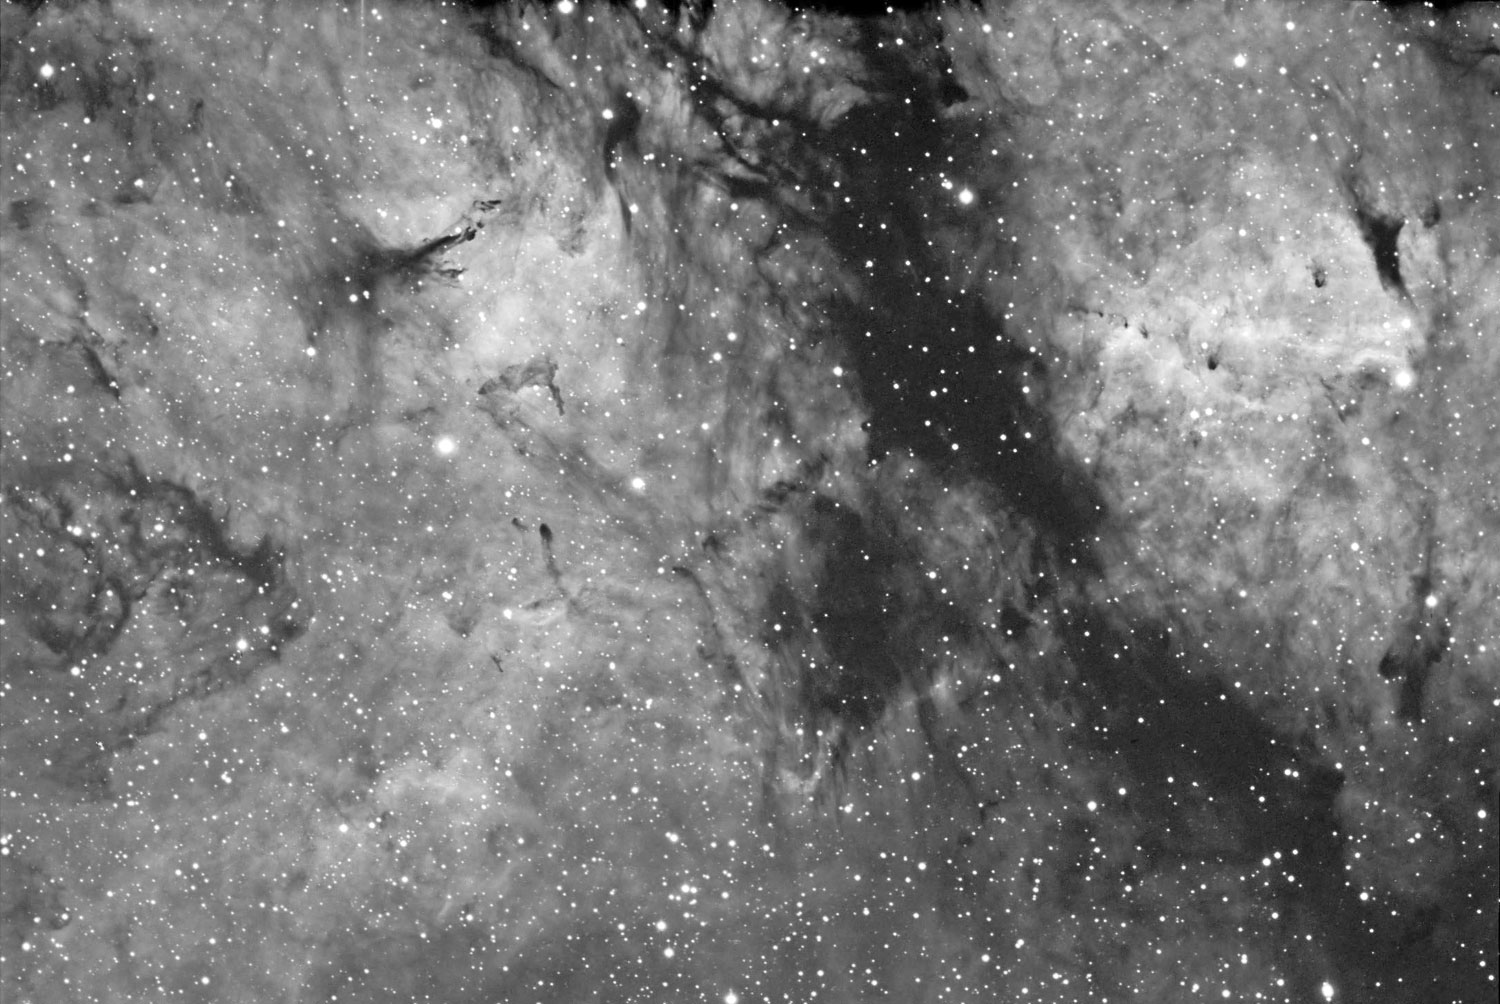
Nebulosity around LDN889 in Cygnus: Original and PS DDP Processed.
I'd love to hear from you if this was helpful and if you have other tips or tricks that improve on this method.

Copyright © 2004 Paul Kanevsky