LRGB combination technique has become the preferred method for creating color CCD images. This technique allows the imager to shorten the exposure time while increasing S/N.
There have been numerous reports that the LRGB process reduces the vibrancy and contrast of colors in the image. This is most evident in the star colors of many images processed this way. Very often the stars are left mostly white with very little color saturation. To see an more detailed analysis click here. The proposed method helps preserve color saturation while retaining the benefits of LRGB. First, I'll describe the basics of the algorithm, and then how the same process can be applied in PhotoShop 6.
The trouble with most LRGB methods is that the Luminance used is inversely proportional to the saturation of the image. The brighter a pixel in the L channel, the lower the saturation of that pixel in the final image. To remedy this, the following algorithm is proposed:
Step 1. For every pixel in the RGB image, compute the ratios of R : G : B, giving the new ( r', g', b') value for the pixel. This produces the color ratio that is independent of the brightness of that pixel.
Step 2. Multiply each of the values from Step 1 by the value of the luminance pixel, L, giving the new pixel value (L·r', L·g', L·b'). This step scales the r':g':b' ratio by the brightness of the luminance pixel.
That's all there is to it! The resulting LRGB pixel will contain nearly all of the saturation of the original RGB pixel, while its brightness will be scaled based on the pixel in the Luminance frame.
Although PhotoShop is a powerful piece of software, it is not designed for precise mathematical manipulation of image data. For this reason, the Color Ratios LRGB process can only be approximated in PhotoShop. In most cases the results are excellent and match closely the original algorithm. In other cases, the lower precision in calculations and the slight differences in software versions cause results to suffer. The only way to find out if it works is to try it.
The procedure in PhotoShop 6.0 is very straightforward.
(NOTE: For other versions of Photoshop, and for the version-independent instructions, please click here)
Here are the steps for P.S. 6.0.
Pay particular attention to steps 2 and 3. They are critical to getting this method to work properly:
Step 1. Duplicate the original RGB image to a new document RGB copy
Step 2. Convert RGB copy image to Grayscale using Image/Mode/Grayscale menu command
Step 3. Invert RGB copy image by selecting the Image/Adjust/Invert command
Step 4. Copy RGB copy image and paste it as a Layer 1 into the original RGB image
Step 5. Set the combine method for Layer 1 to Color Dodge:
Step 6. Paste your Luminance image as Layer 2 into the original RGB image
Step 7. Set the combine method for Layer 2 to Multiply:
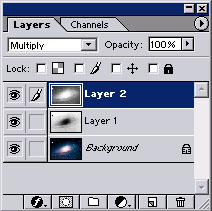
Step 8. You are done! You should have three layers in your final image:
Layer 0 = Background is your original RGB image
Layer 1 = Grayscale, Inverted copy of your original RGB image set to Color Dodge at 100% opacity
Layer 2 = Your Luminance frame taken, presumably with a clear filter set to Multiply at 100% opacity
Here is an example image processed this way and compared the conventional LRGB processing techniques:
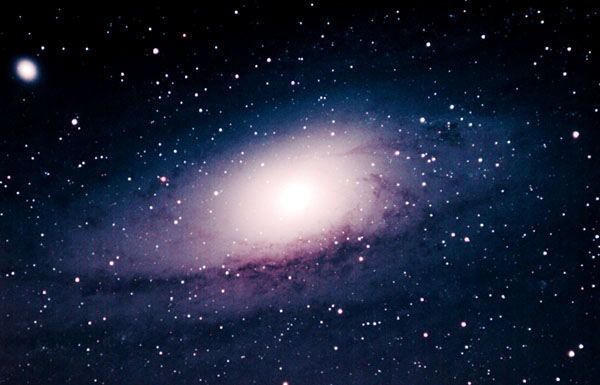
1. Original RGB image:
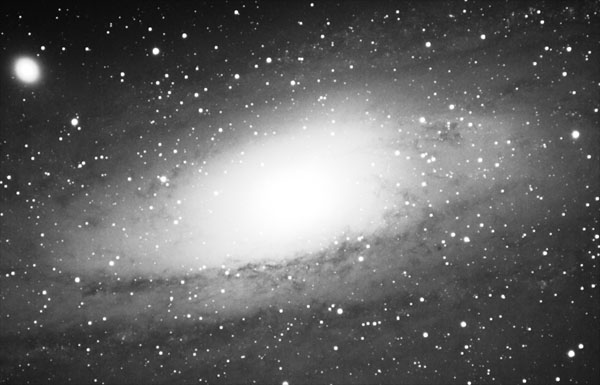
2. Original Luminance image:
3. Conventional LRGB combine using Luminance layering technique:
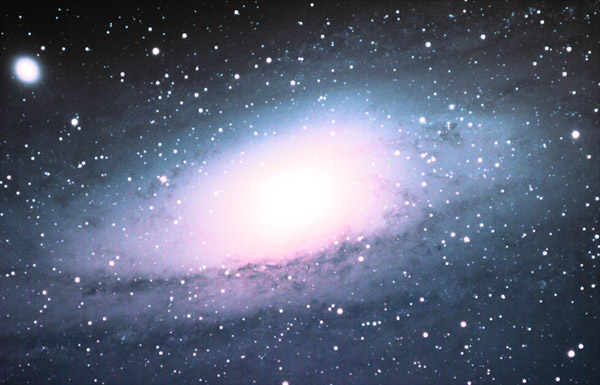
4. Conventional LRGB combine using Lab L channel replacement :
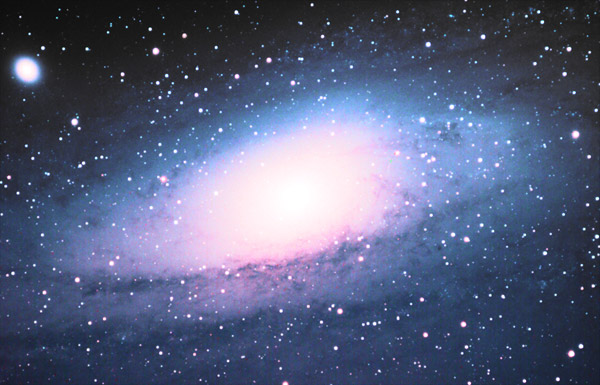
5. And finally, the Color Ratios LRGB combine method:

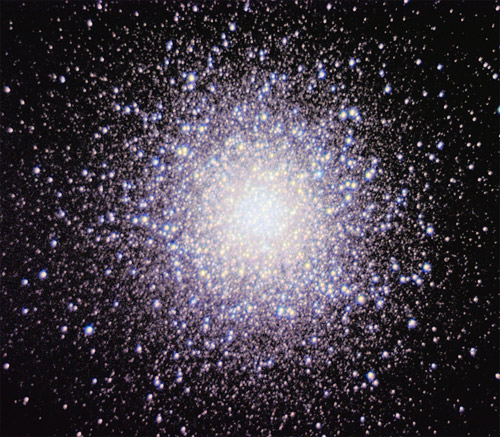
Another, more subtle example demonstrating better color saturation of the Color Ratios method:
1. Original RGB Image of M13:
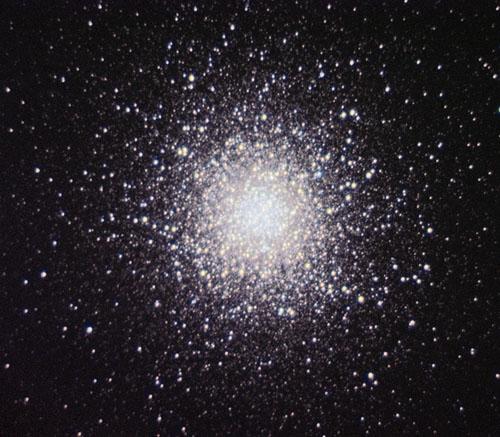
2. Conventional LRGB combine:
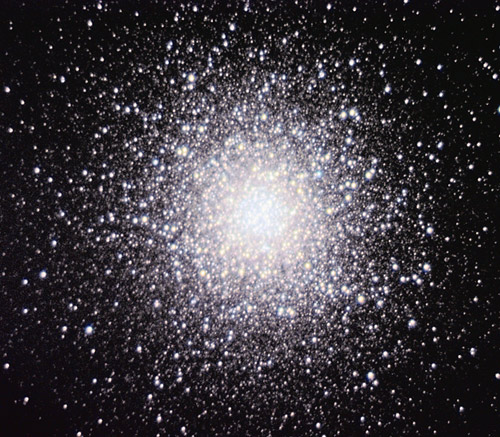
2. Color Ratios LRGB Combine of the same image:
Please, drop me a line to let me know what you think of this method and if you have any comments or suggestions: e-mail.
Copyright © 2001,02 Paul Kanevsky