PhotoShop
Tips for Selective Brightness Masking
Written by Paul Kanevsky, M33 image provided by Rick
Yandrick
The following discussion is based on the PhotoShop version 6.0,
but similar tools existed in version 5.0 and I believe are still there in
version 7.0.
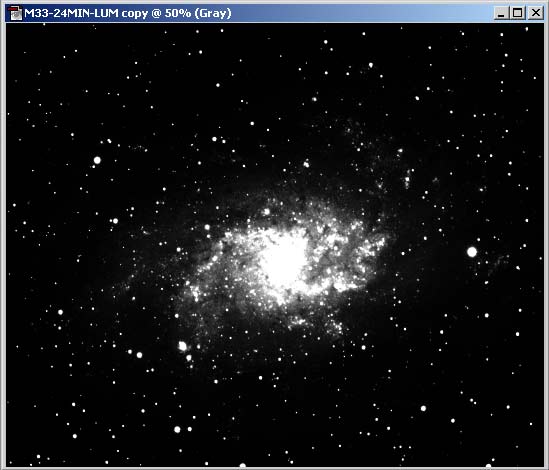
When working on an image of a galaxy or another
wide-dynamic range object, you'll often want be able to increase
brightness and contrast of an area of the image without altering the background.
Or, you may want to apply an Unsharp Mask, but only to the core of the galaxy.
Alternatively, maybe you'd like to apply a Gaussian blur to just the dim areas
of a nebula. Here is a technique that allows you to select an area of an image
in proportion to its brightness.
1. Load your 16-bit image into PhotoShop

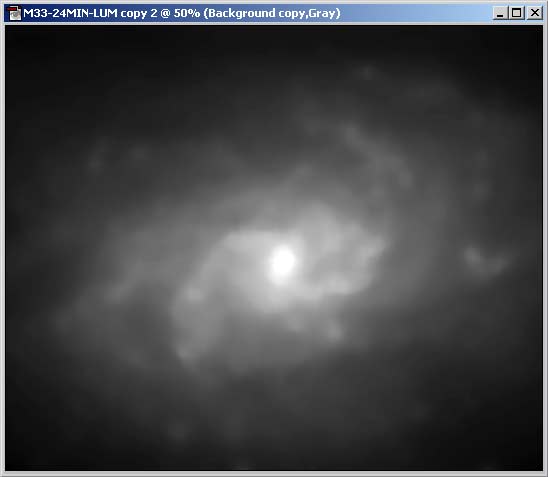
2. Duplicate your image and convert the copy to the 8-bit Grayscale mode:
- Image/Duplicate... menu
followed by
- Image/Mode/8 Bits/Channel
menu
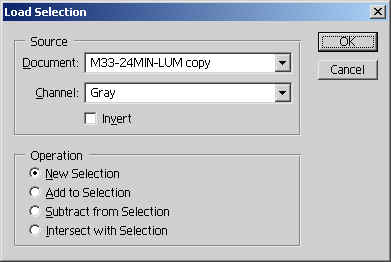
3. Switch to the original image and choose the Select/Load Selection menu
option. If this option is grayed out, make sure you converted the copy to the
8-bit mode, as the selection mask must be an 8-bit image.
4. Working with your original image, select the copy image as the source of the selection:
5. If you want to make changes to the dim areas, go ahead and
check off the Invert box in this dialog.
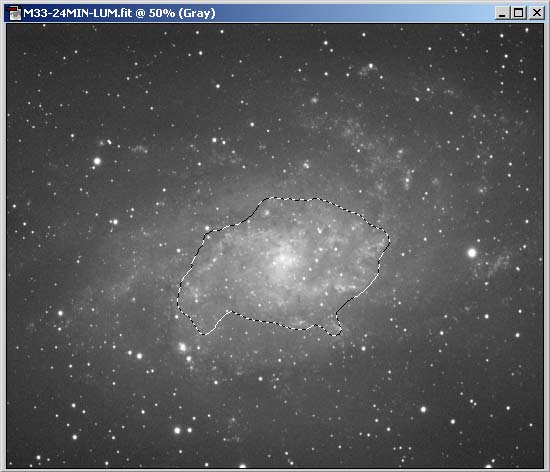
6. Click OK and PhotoShop will create a variable transparency mask that is based
on the source image. The brighter the pixel in the source image, the more the
corresponding pixel will be affected by changes.
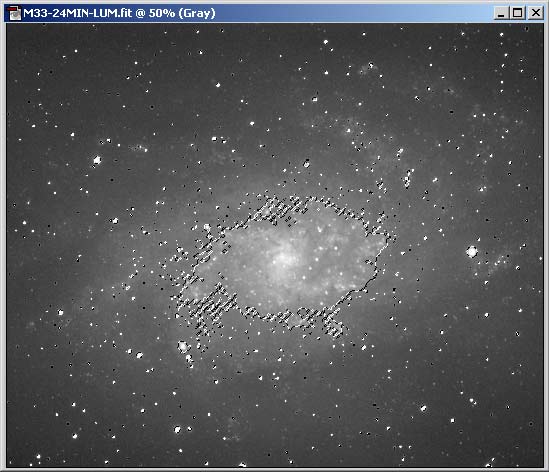
Note that the selection band in PhotoShop indicates the area
where the image is 50% selected. In the brightest areas, the selection is 100%,
and in the dim areas - 0%. The bright areas include most of the stars,
since they are all pretty bright.
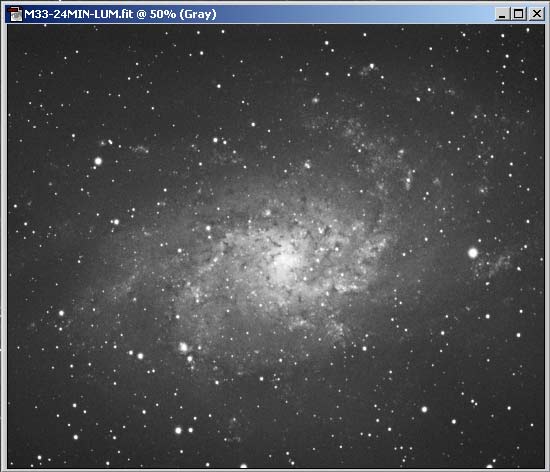
7. Now you're ready to apply image adjustments. The adjustment
will be much more pronounced in the bright areas (dim, if you selected the Invert
check box). Below I applied an unsharp mask and a curves tool to bring out more
detail in the galaxy core:
After adjusting the bright areas, you can easily change the
selection to focus on the dim areas by selecting the Select/Inverse menu
item.
Shortcut
There's a shortcut to load a brightness selection into an 8-bit
image. Just go to the Channels selector and hold down the Ctrl
key while clicking the mouse on the Gray channel:
Advanced Topics
You have a lot of control as to how much of the image is
selected using the brightness mask. Let's say that you really want to select the
brightest areas of the image, and reduce the selection of the dimmer areas even
more. To accomplish this simply adjust the contrast of the selection image (the
8-bit copy that was created in step 2 above), and then follow the same
directions for loading it:
There's no limit as to what you can do with the mask image.
Another example would be to eliminate the stars from the selection. To
accomplish this, use the Dust and Scratches removal filter (Filter/Noise/Dust&Scratches
menu):
Now, when loaded into the main image the selection is focused on
just the bright areas of the galaxy, excluding all stars:
There's another neat tool in PhotoShop called the Layered Mask.
This allows you to apply curves, contrast adjustments, etc. to a layer without
modifying the pixels of the layer. This transformation is temporary and can be
removed at any time or applied and made permanent. Furthermore, the layered mask
allows a brightness selection mask to be attached to it, so the adjustment is
made to a specific area of the image, just like in the above discussion. This is
a complex topic and will require another tutorial page yet to be written...
Copyright © 2002 Paul
Kanevsky
